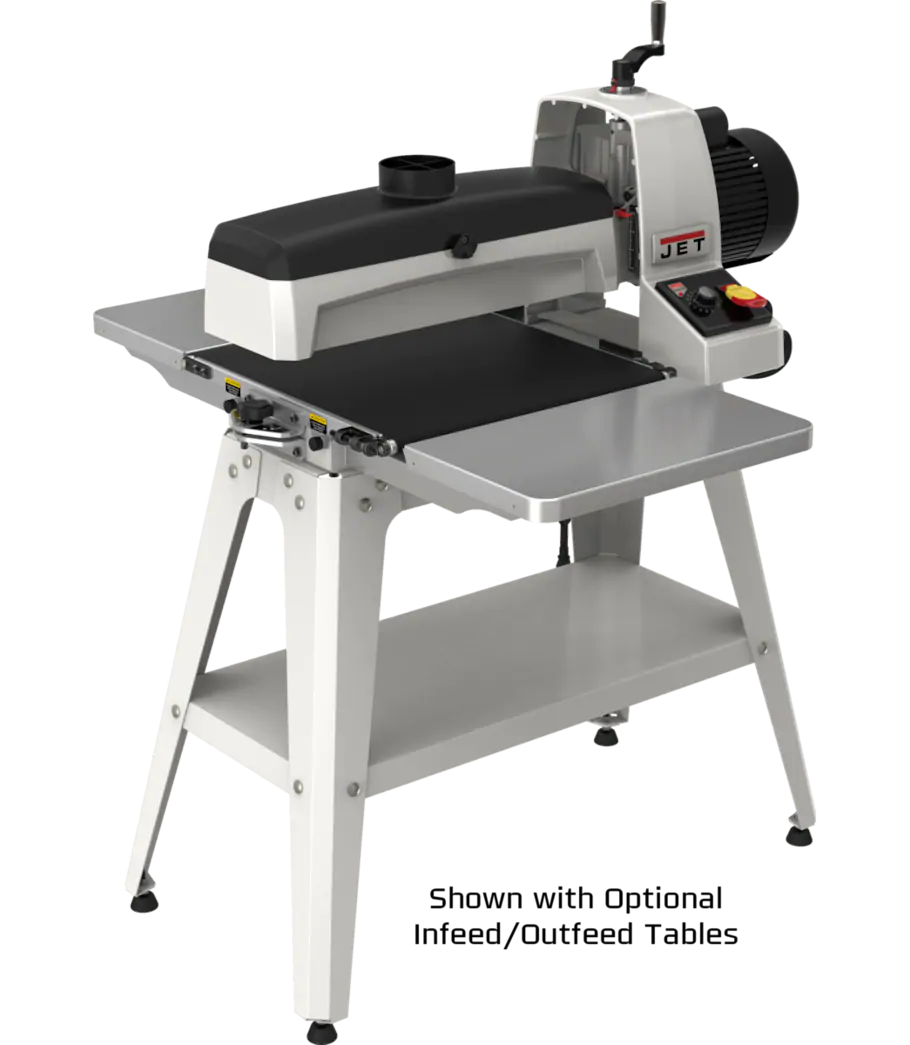
JET 1836 Drum Sander
| Aliases | |
| Official Maintainer | To be determined |
Current Status
Usable
The conveyor belt is torn. We are in the works of buying and replacing the part.
Ale Moré 12/01/2021
Usage
This machine does not require induction to use, however it is important that you familiarise yourself with the correct operation of the machine, including all safety and operating instructions contained in the user manual, prior to use. Incorrect use can damage the machine
The drum sander is not meant to remove a lot of material, but to provide good flat finished surfaces. Taking super shallow passes is critical to not damaging the machine or your work piece.
Guidelines
Recommended PPE
| Recommended |  | We recommend hearing protection. |
| Recommended |  | Please wear goggles or a face shield |
| Recommended |  | We recommend the use of a respirator |
| Warning |  | Gloves are PPE against your material (splinters, resin etc) but are hazardous around the rotating machinery. Please carefully evaluate your use of gloves |
| Required |  | Remove all jewelry and watches |
| Required |  | Enclosed shoes are required, no open sandals, thongs etc |
| Required |  | Dust extraction must be used at all times during operation |
| Maintenance |  | Disconnect power to the machine before performing maintenance, including changing sandpaper |
Changing Abrasive
Reference Drum Sander Manual Section 6.7.
- The abrasive sandpaper is cut from a template (Drum Sander Template v5) located in the woodshop. Select the desired grit to fit.
- Confirm the correct feed direction of the abrasive by checking the arrows on the underside of the paper against the drum rotation.
- Feed sandpaper on to the drum from the left side of the drum (insert photo). Fit the end of the paper into the fastener by depressing the lever and feeding into the slot. Ensure the edge of the abrasive is aligned with the edge of the drum. Keep tension on the abrasive whilst rotating the drum to feed the paper. Ensure that the abrasive does not overlap itself, leave a slight gap if anything. When you have reached the other end, secure the end of the abrasive into the take up lever. The take up lever is spring loaded, so that it keeps tension on the paper. Ensure you press the takeup lever fully in so that the spring tension is maintained.
Caution - check the paper periodically for security. If the paper becomes loose it can overlap itself and cause binding against the material which will damage the abrasive, the machine, and your workpiece!
Available Abrasives
The woodshop supplies 60, 120, and 240 grit papers for the drum sander.
Adjustments
Cut Depth
For setting initial cut depth, with the machine off, insert the work piece under the drum. Spin the drum by hand whilst winding the drum height down slowly until it just contacts the workpiece. Note the position of the drum winder. Back off the drum winder by two full turns and release the work piece, then bring the drum back down to the set height by winding back in two full turns.
On subsequent passes, only lower the drum height by a small amount (maximum of 0.4mm each pass: 1/4 turn). Less than 0.2mm is recommended, particularly for large work pieces or finer paper. Finding the correct cut depth and speed takes experimentation. Watch your workpiece closely and make minor adjustments on each pass to achieve a good outcome.
Caution - Improper use can damage the machine!
Feed Rate
Don't run the feed rate too slow, which can lead to burning of the paper and work piece. 50 is a good start. Refer to the user manual for operation of the feed rate and description of the SandSmart controller.
Pre-start Checks
- Ensure the area is clear and no hazards exist.
- Check the security of the power plugs and vacuum hose connection.
- Check the correct abrasive is fitted and change if necessary. Confirm security and tension of the paper.
- Check the correct initial drum height is set.
- Check the correct initial feed rate is set.
- Check the dust collector is serviceable. Empty bag if necessary.
Clean up
- Reset controls to off positions.
- Sweep up dust and shavings.
- Empty dust collector bag if necessary.
Machine Specifications
PLACEHOLDER: Please fill out this table with all relevant machine specifications. The manufacturers website usually gives a good list. Delete this line.
Documents
Manufacturer
PLACEHOLDER: Document the manufacturer, things like contact person names, emails, phone numbers, product urls etc. Document the reseller we bought from, and any other sources for similar things. Delete this line.
Manufacturer
Reseller
- Mr. Re seller
- Reseller Agencies
- E sales@reseller.com
- M 0000 000 000
Known Identical Models
- Links to other machines that are a rebrand or similar
Known Issues
| Date | Description | Workaround | Proposed Remediation |
|---|---|---|---|
| 01/01/2020 | PLACEHOLDER Describe the problem | PLACEHOLDER Describe the workaround currently in place | Placeholder Describe a proposed fix or solution |
Modifications / Repair History
| Date | Modified By | Description | Remediation | Cost |
|---|---|---|---|---|
| PLACEHOLDER –/10/2020 | PLACEHOLDER | PLACEHOLDER | PLACEHOLDER | PLACEHOLDER |
Accessories
| Image | Category | Accessory Name & Notes | Location | Buy from |
|---|---|---|---|---|
| PLACEHOLDER Image, 100 width | PLACEHOLDER Category of accessory | PLACEHOLDER Accessory Name PLACEHOLDER Description and usage notes for accessory | PLACEHOLDER Describe location of accessory | PLACEHOLDER Link to where it was bought from |
Consumables & Running Costs
| Image | Category | Accessory Name & Notes | Location | Buy from |
|---|---|---|---|---|
 | Abrasive | Sand paper 60 Grit | Cut templates are stored under the sander. Rolls of uncut are in the cupboard | PLACEHOLDER Link to where it can be bought |
| | Abrasive | Sand paper 120 Grit | Cut templates are stored under the sander. Rolls of uncut are in the cupboard | PLACEHOLDER Link to where it can be bought |
| | Abrasive | Sand paper 240 Grit | Cut templates are stored under the sander. Rolls of uncut are in the cupboard | PLACEHOLDER Link to where it can be bought |
Maintenance
| Interval | Task | Last Check |
|---|---|---|
| PLACEHOLDER Pick one: Daily/Weekly/Monthly/Quarterly/Biannual/Annual | PLACEHOLDER Description of maintenance task and any relevant parameters | Last Check |
RACI
PLACEHOLDER A RACI is an important documentation process to let people know what ACTIONS can happen, and who needs to be Responsible, Accountable, Consulted and Informed for each ACTION. Delete this line.

| Task / Action | Executive | Cause Leader Cause Team | Named Maintainer | Trainers | Cause | Membership | Implementer |
|---|---|---|---|---|---|---|---|
| Modification and Repairs | - | AC | C | I | I | I | R |
| Induction changes | C | RACI | RC | I | I | I | R |
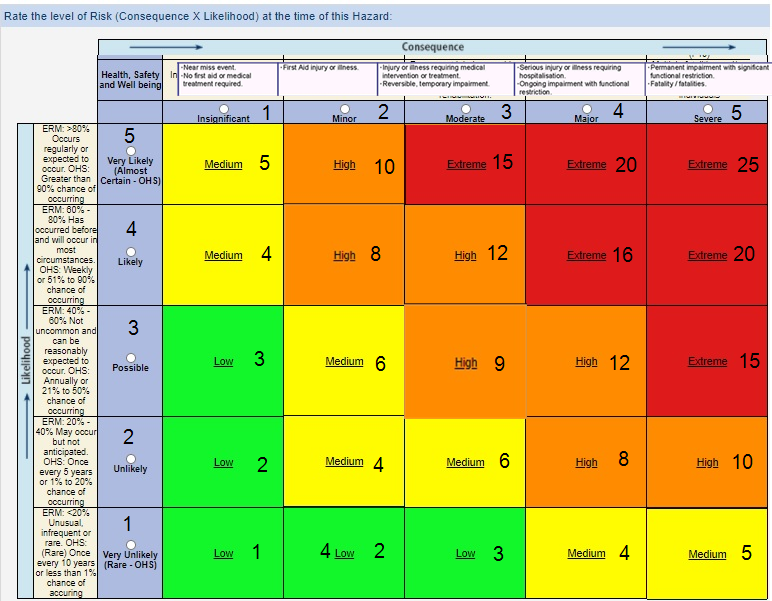
Risk Matrix and Mitigation
PLACEHOLDER: Risk assessment is important to ensure we are making tools available to members in a responsible fashion. Please make every effort to do a reasonable risk assessment. If there is a safety incident with the tool, please redo a risk assessment and add it to the table.
| Ref / ID | Pre-Mitigation | Mitigations / Warnings / Remedies | Post Mitigation | ||||||
|---|---|---|---|---|---|---|---|---|---|
| Risk | Risk Severity | Risk Likelyhood | Risk Level | Risk Severity | Risk Likelyhood | Risk Level | Acceptable to Proceed | ||
| 0001 | PLACEHOLDER DEATH | Intolerable | Probable | 11 | PLACEHOLDER Induction to train users in correct usage | Low | Improbable | 1 | |
Decision Register
PLACEHOLDER: A decision register is for general documentation when some decision is made regarding the tool. To change its location, mode of operation, to buy an accessory, to replace something, to change how it operates etc. Delete this line.
| Ref / ID | Decision Details | Impact | Proposed Date | Proposed By | Status | Approved By | Date | Resulting Actions and Comments |
|---|---|---|---|---|---|---|---|---|
| 0000 | Example decision | Provides an example | 08/08/20 | JH | Approved | JH | 08/08/20 | A line was put in the register |
- tools/woodshop/drumsander
- Last modified: 6 years ago
- by
 ale
ale